
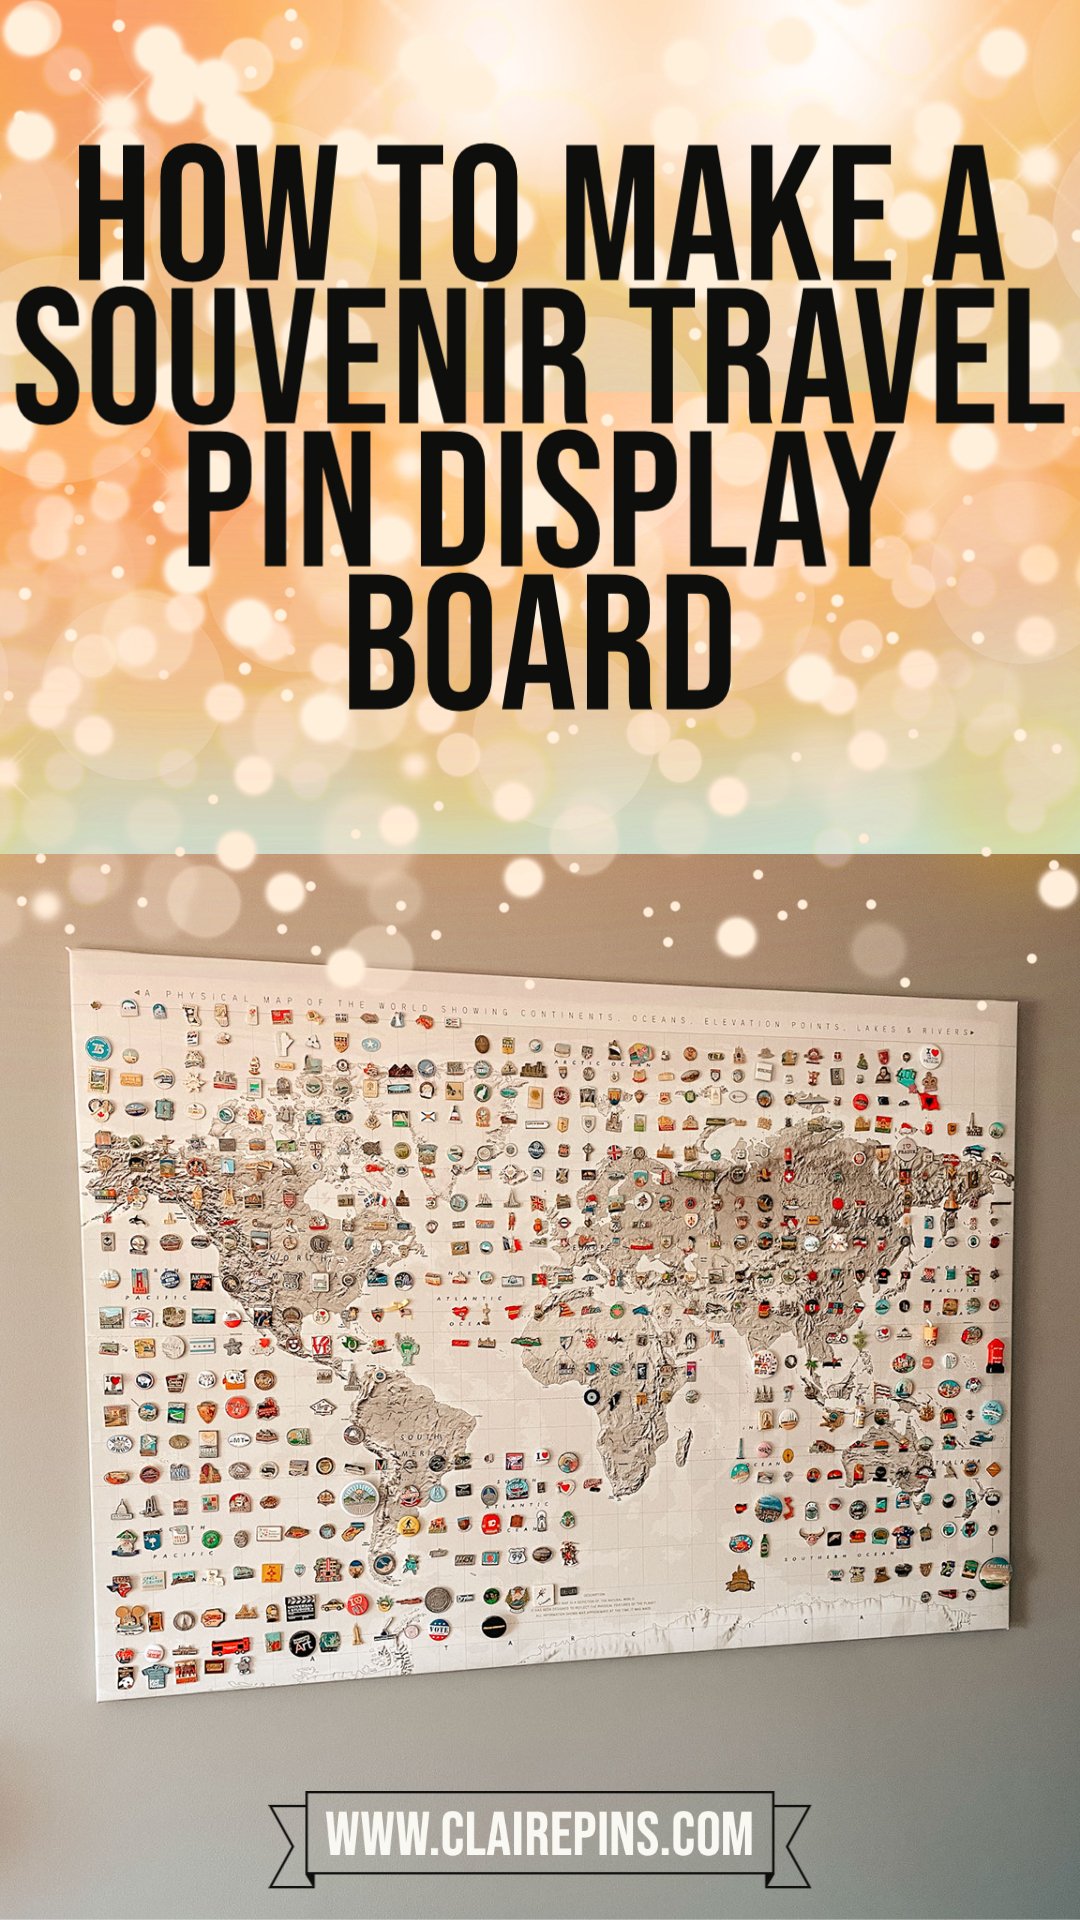
How to make a souvenir pin badge display board using a canvas print

How do you display 700 souvenir travel pins in an organized and attractive way ?
After 25 years of global travel, I have acquired a collection of about 700 hundred souvenir travel lapel pins (sometimes called pin badges). When I noticed that they no longer fit on a single cork board, I wanted to find a new way to display them all together. So one weekend, I spent several hours visiting various craft, furniture, and hardware stores trying to find a fun and easy solution for how I could display my collection.
I was inspired by a large canvas print map of the world I saw in Ikea, so I purchased it and after a trip to the hardware store and some creativity, I came up with a solution that I want to share with you so you can create your own canvas print display board in the size of your choice!
Keep reading to find out how to make your own display board!
1. Collecting souvenir travel pins
Lapel pins are small, affordable, easy to find and easy to transport, so in my opinion, they make a great travel souvenir and a nice way to remember your travels.
They can often be found at souvenir shops, tourist information centres, museums, galleries, town halls or chambers of commerce, antique markets and fairs and even thrift stores. They typically cost less than five dollars, although handmade original artist designs or popular trading series like Disney may cost substantially more.
I like to get a pin at every destination I visit, and over the years I have collected about 700 pins and I enjoy going up to my display board to find a particular pin and remember everything I did, the people I met, and all the adventures I’ve been on.
2. How to display a pin collection
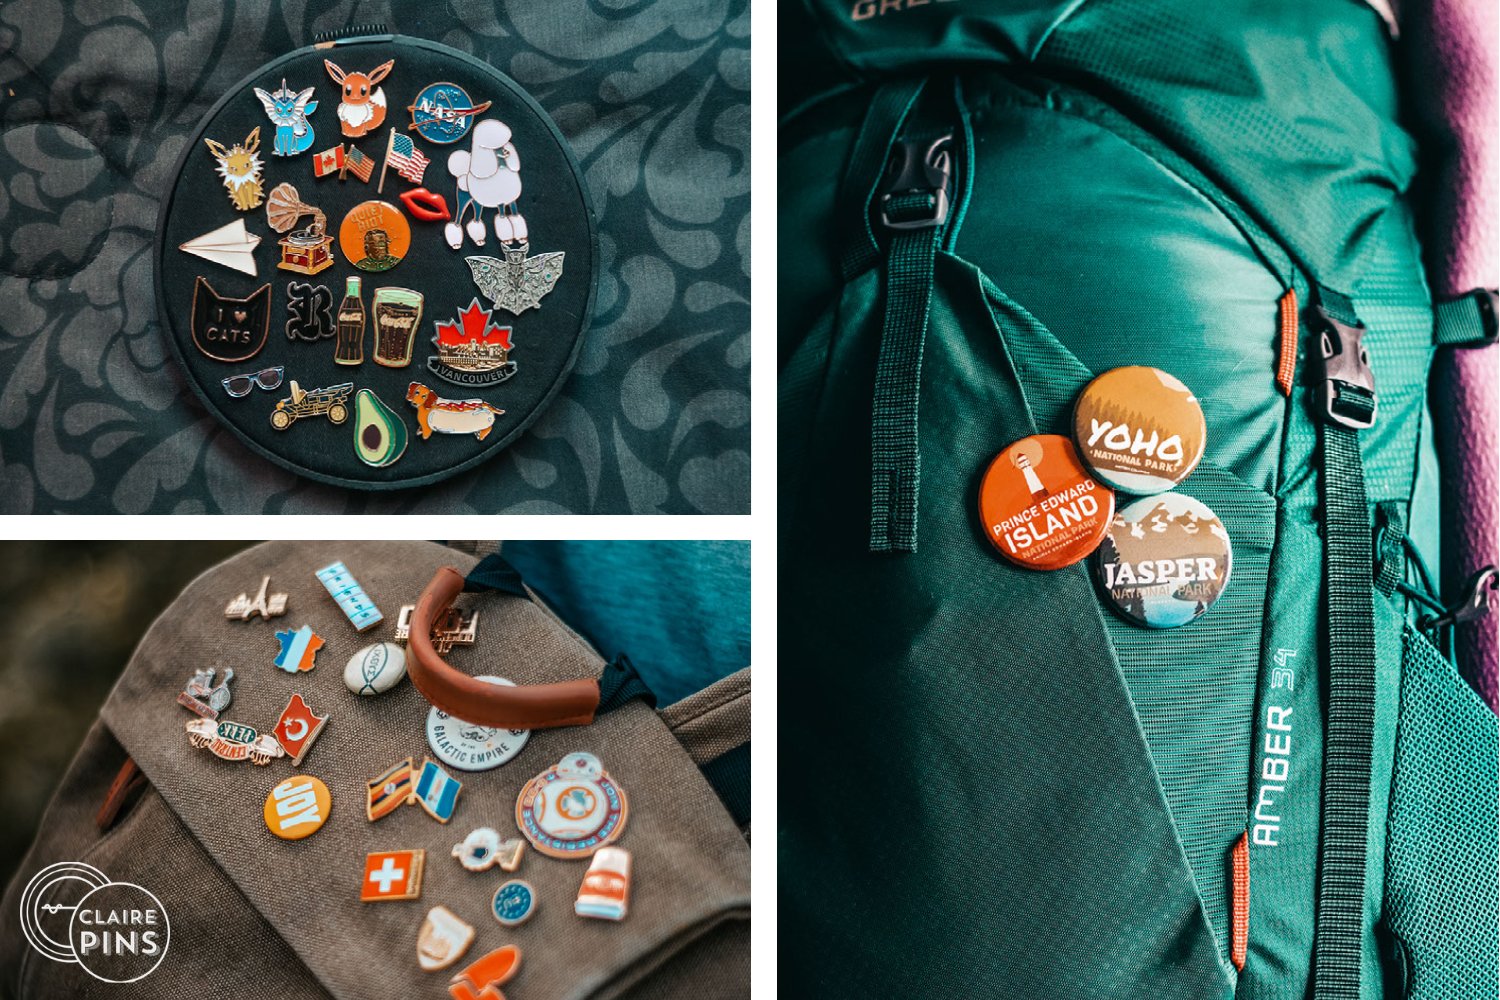
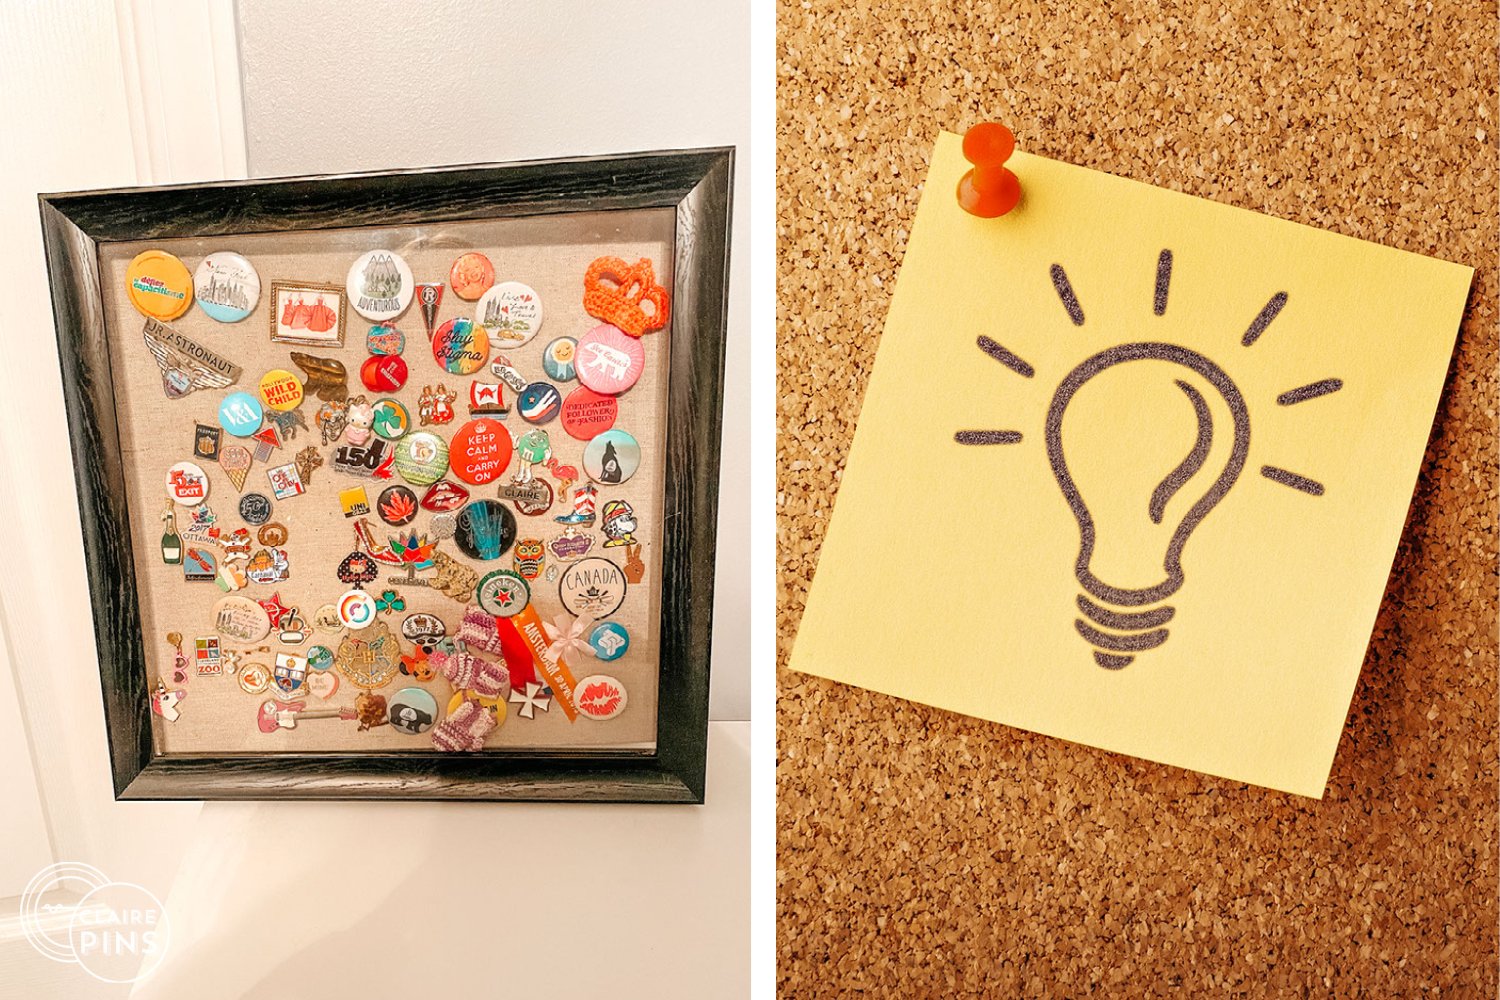
While you could certainly display a small souvenir pin collection on a hat, blanket or in a pre-made shadow box, a larger collection may be too big to fit on even an office size cork board.
I have come up with a creative solution using a canvas print and foam insulation board to display a collection of several hundred souvenir pins safely, easily and affordably. Keep reading to find out how to make your own customised souvenir pin display board using a canvas print of your choice.
3. Display your collection on a canvas print
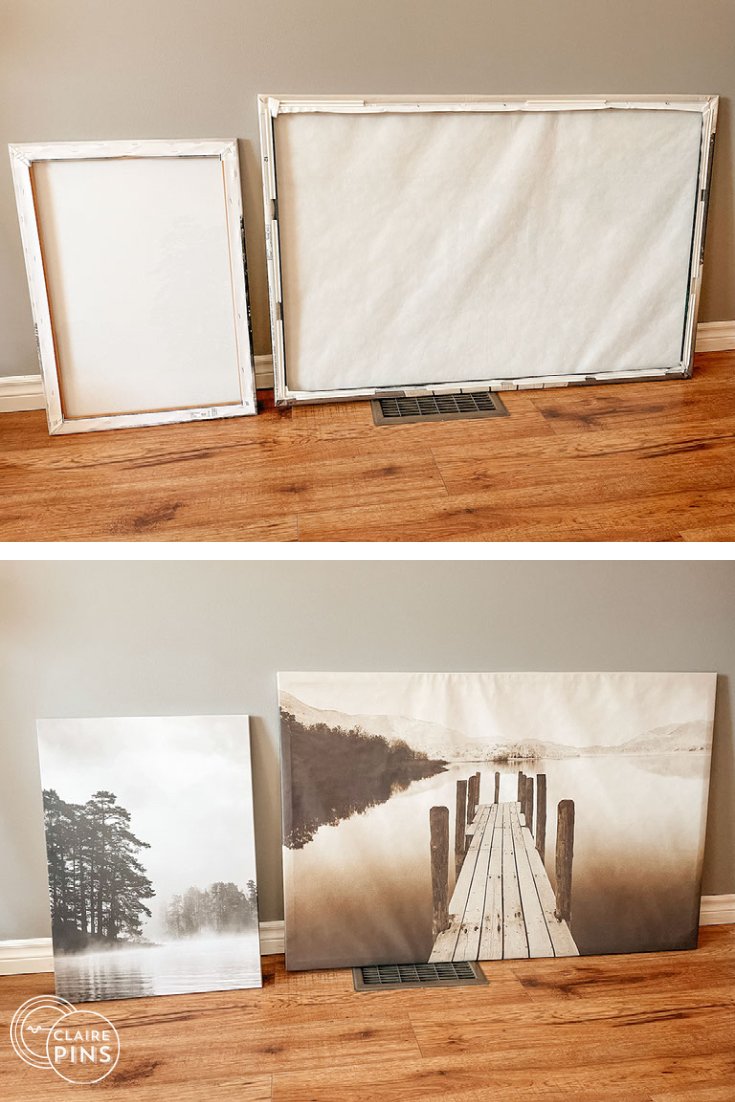
The first step is to purchase or create a canvas print. For this project to work, you need to select a canvas that has been stretched over a frame, so that there is an empty space in the back that you can fill with foam. Keep in mind how many pins you have to cover the canvas, as you may not want a really complicated or busy background design.

4. Choosing a canvas
Here are some ideas for choosing the canvas for your display board.
A fun idea would be to get one of your own pictures custom printed onto canvas for a really unique look, this can be done by many online retailers
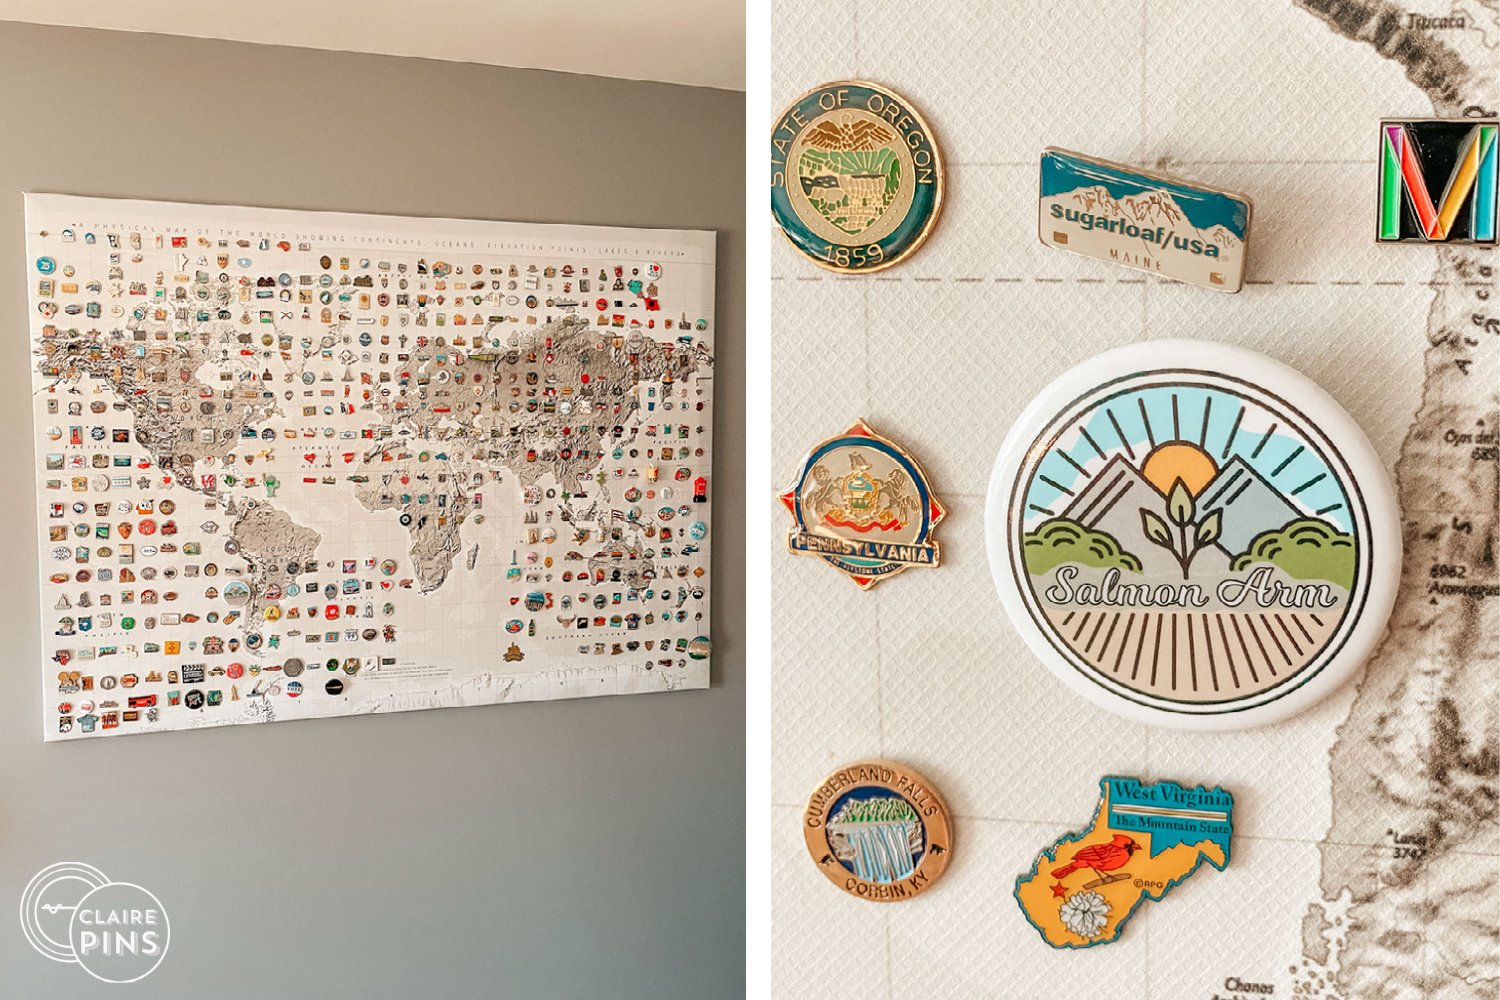
A canvas print of a map or other travel related theme might allow you to showcase where you’ve been. An added bonus of maps with latitude and longitude lines is that it will be easy to line up your pins to be straight and level on the canvas
Try Ikea, or a discount department store like HomeSense, Winner’s/Marshall’s or TJ/TK Maxx for a printed canvas
Consider supporting a local artist and commission a custom design on a canvas
Buy a blank canvas at a craft store like Michael’s and paint something yourself
You could try a thrift store like Value Village or an antique store to find a vintage option
5. Select a foam backing
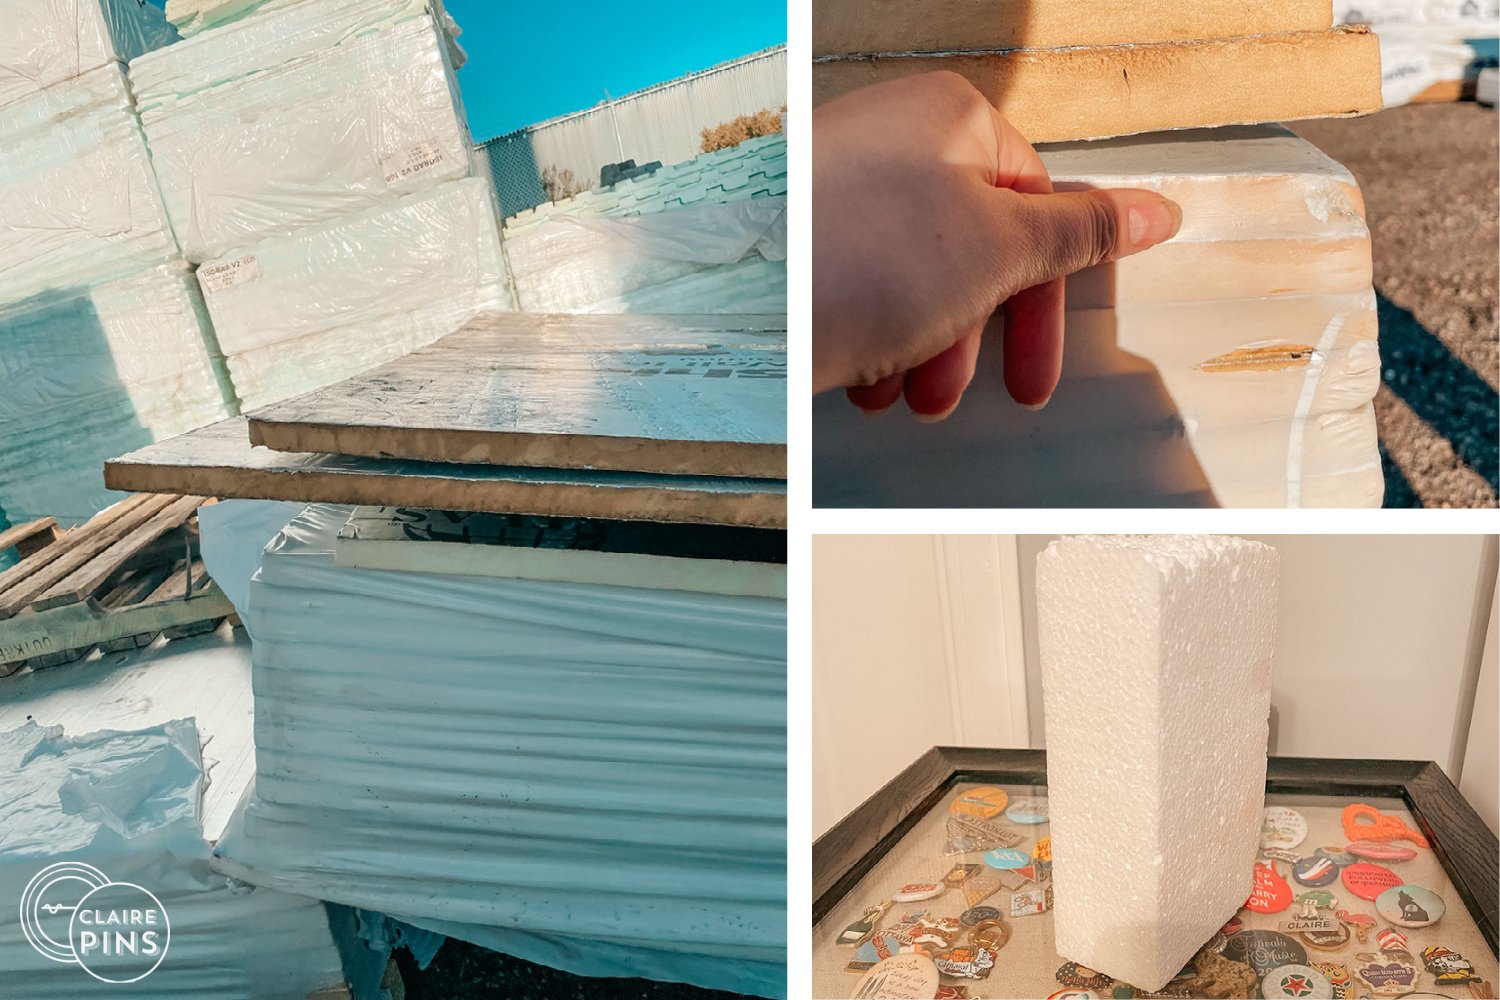
Purchase one sheet of rigid foam insulation or similar foam board around half an inch thick. It usually has a silver coating covering one side. This is typically available from a standard hardware store for about ten dollars.
Do not get fiberglass insulation or really low quality thin ‘Styrofoam’ as it will disintegrate into small pieces once the pins are pushed into the foam backing. If you only have a small canvas (a few inches across) something cheaper and thinner from a craft store might work, but for a large print several feet wide, you will want a piece of foam that is sturdy enough to support the weight of your pin collection.
Be aware that really large pieces of insulation foam as they are sold in the store may not fit in the back of a small vehicle, we had to bring ours home in a pickup truck.
Once you have gathered all your materials, mesure out the size of foam insulation you will need and mark it with a pencil. Next, score it with an Exacto style knife and break the excess off, be careful about using scissors on thick foam as you could be left with very rough, uneven edges. The cutting process may produce some dust or small pieces of foam, so you could do this outside or over a plastic sheet.
6. Make a pin design
Next, place the correctly sized foam sheet into the back of the canvas, if it is a good fit, you should not need any glue or tape to hold it in place, but you could add some tape to the back corners of the frame to hold it in place until the pins have been placed through the foam to hold it all together.
Flip the canvas back over laying flat on the floor or a table and start laying out a design for your pins. Remember that once you pierce a pin through the canvas, there will be a permanent hole so it is best to plan out your design and then push the pins through.
Canvas prints like the map shown above that already have straight lines incorporated in the design are particularly useful for making a consistent pattern, otherwise use a measuring tape or level.
7. Modify stick pins and other souvenirs
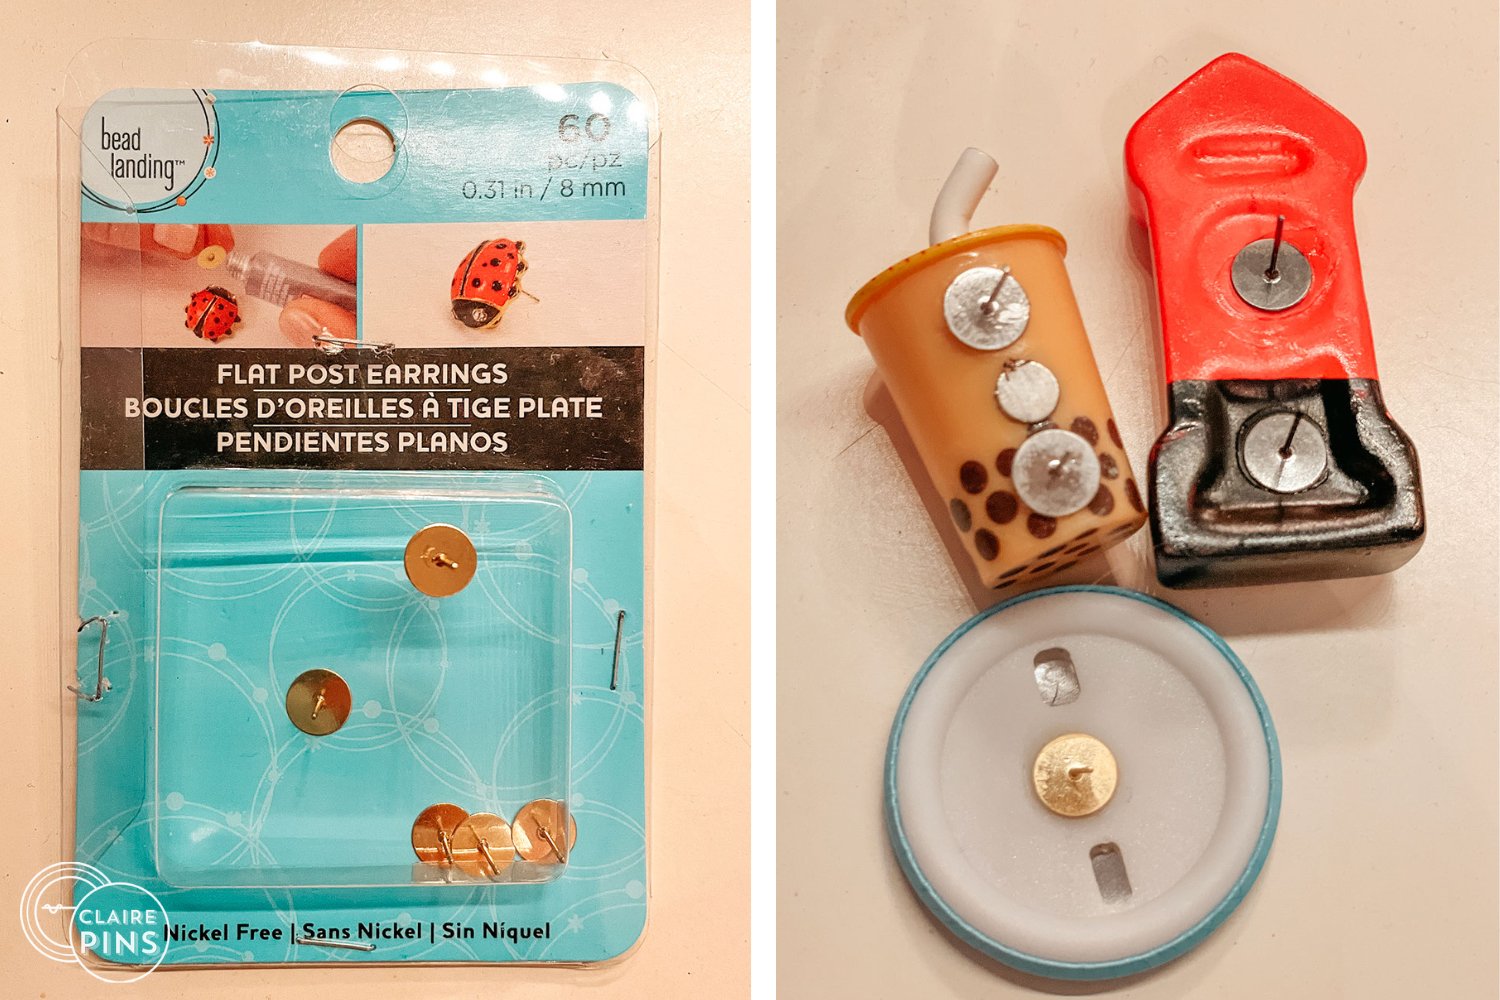
If you have other small souvenir items like a jewellery charm, small magnet or keychain that you want to display on your board, you can easily turn them into pins with super glue and flat thumbtack style pins or plain wide earring posts or bases for jewellery making, both are usually available at craft stores.
If you have old fashioned stick pins in your collection or large pins that hang off balance, you can usually remove the existing pin backing with pliers then glue on a new flat pin backing, consider using two to keep large pins in place.

8. Hang on the wall
Once you have pushed all your pins securely into the foam, get a level and mark out where you want to hang your canvas on the wall. A nail may be sufficient to hang a small, light frame but keep in mind that the finished print could be quite heavy if your pin collection is extensive so you may need to securely anchor your canvas to the wall with proper weight rated fastenings.

9. Materials required
Here is a list of materials required to make a canvas souvenir pin display board with approximate prices.
A canvas print or artwork on a wooden or plastic frame with about half an inch of open space in the back
One sheet of rigid insulation or similar style foam board around half an inch thick. It usually has a silver coating covering one side.
Exacto style knife to cut the insulation down to the size of your print
Screws or fastenings to hang the canvas on the wall
Optional: Superglue and flat earring posts for modifying stick pins
Total cost for materials in Canadian dollars in 2019
Foam Insulation Board from Home Depot 12.00$
Ikea Canvas Map Print : 100.00$
Screws and Fastenings: 5.00$
Exacto style knife: 7.00$
SuperGlue: 5.00
Flat earring posts from Michaels Craft Store: 8.00$
Total: 137.00 $
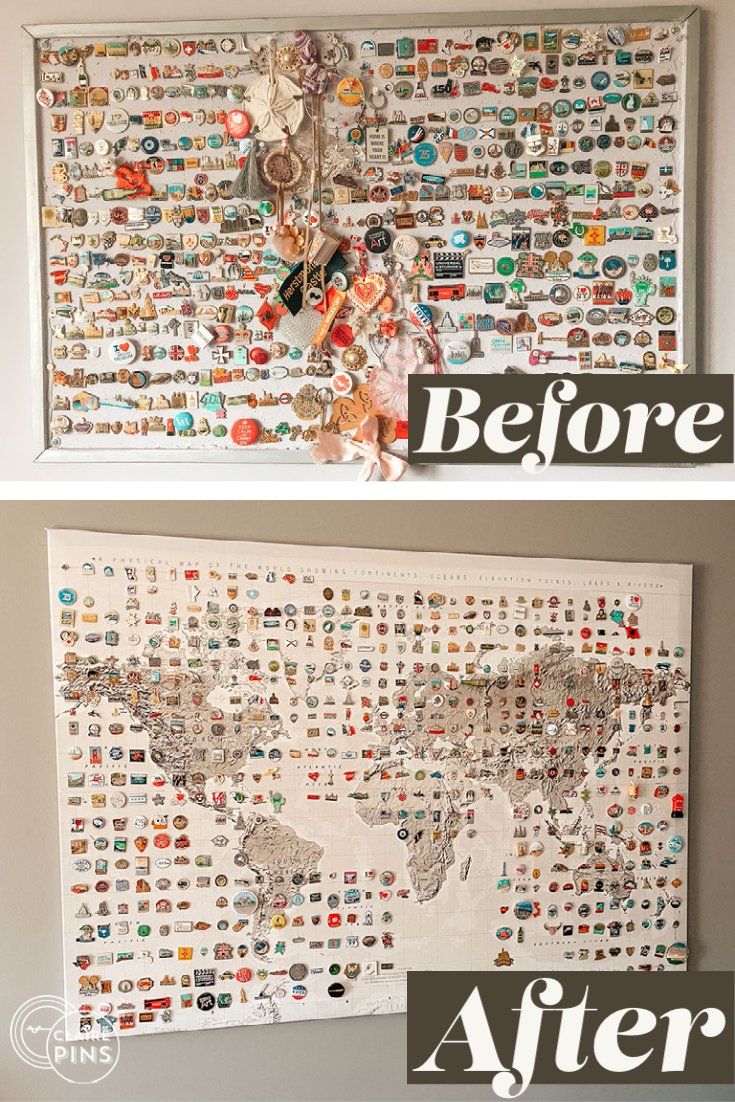
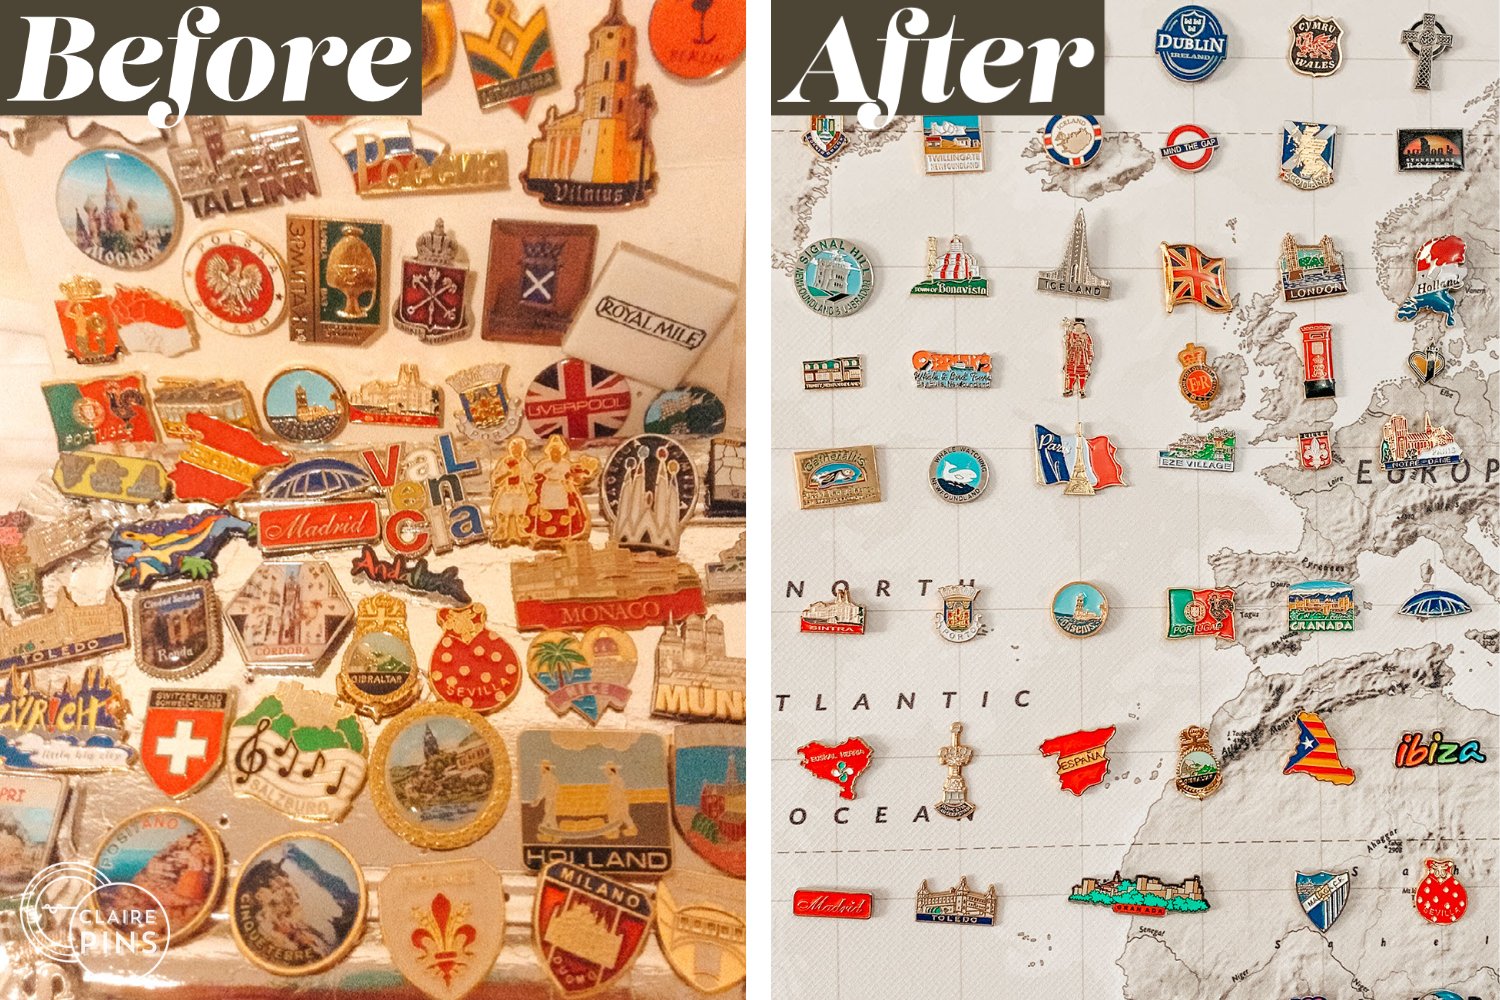
10. Before and After
I really enjoy being able to see my entire travel pin collection in one convenient location, and it makes a nice art work and conversation piece.
It also inspires me to keep travelling !
Do you collect any souvenir items ?
Share about your collection in the comments below.

Pin it or share it

New on the blog

Whether you are looking to travel alone or with friends, here are 13 fun ideas for places to visit and trips to take in your 20s !